ABL / Account Debtor-Vendor / Debtors
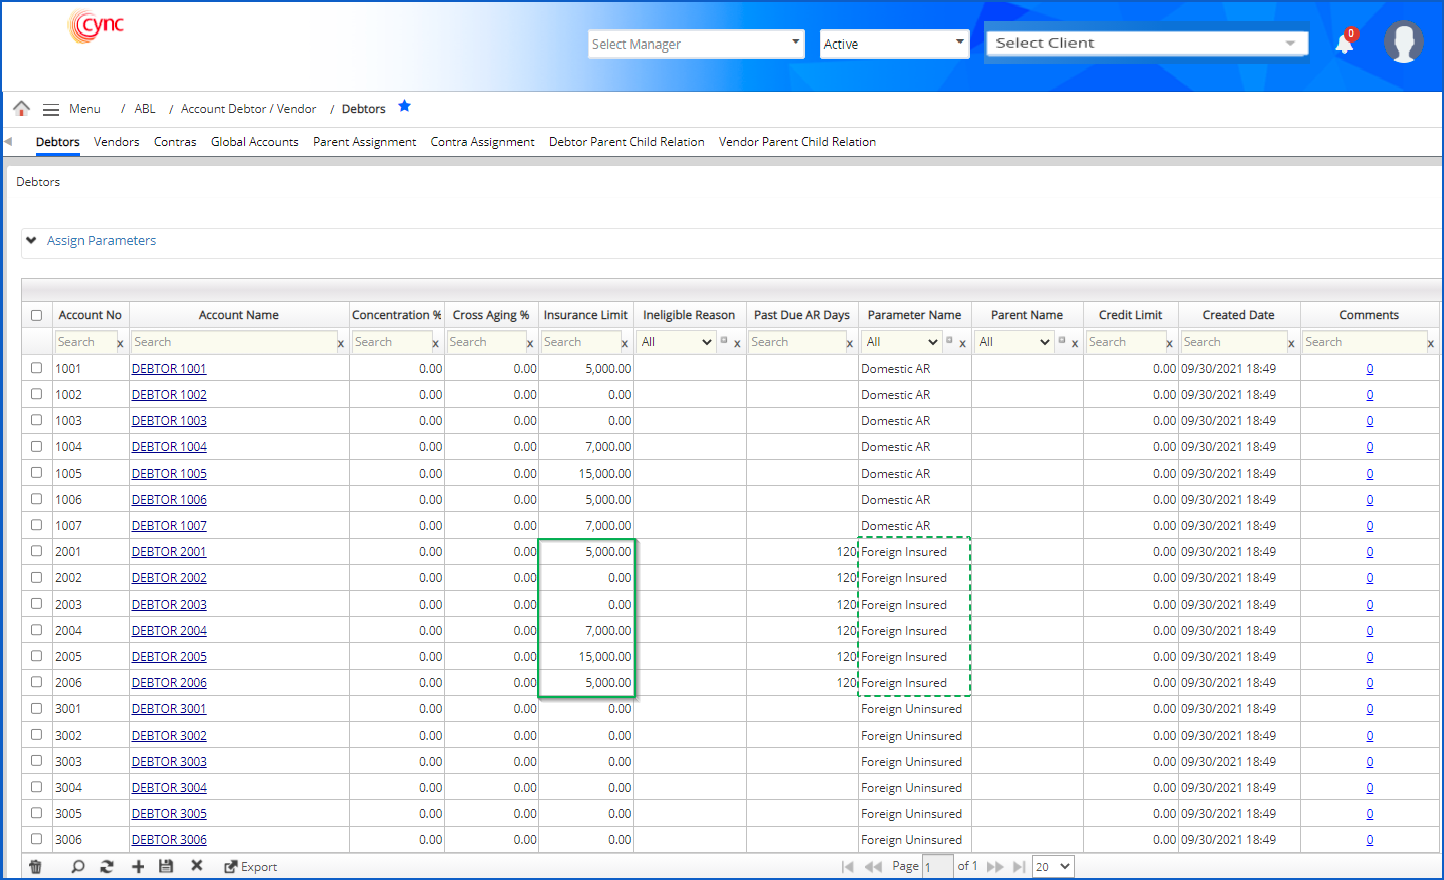
Debtors
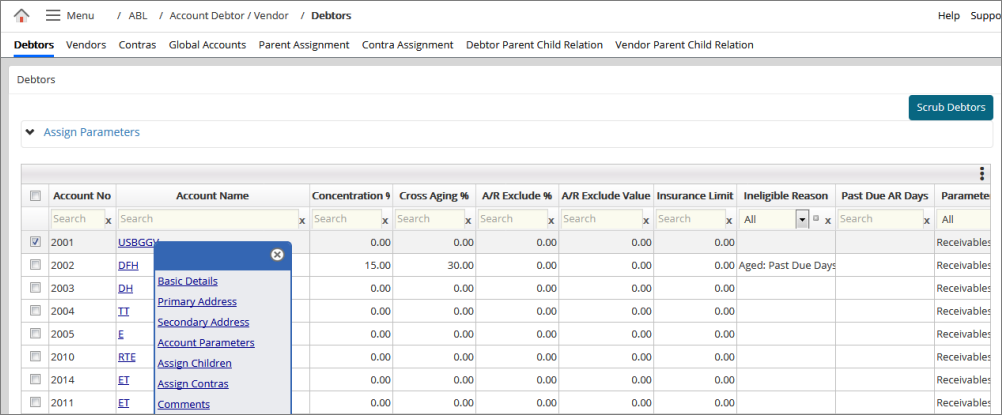
The Debtors page shows specific loan parameters of the borrower's account debtors. This screen allows you to create new Debtors, as well as update existing ones.
If a file is uploaded, then the records automatically appear here and users can edit as needed.
Navigation: ABL → Account Debtor/Vendor → Debtors
Refer to the Screenshot:
Fields and Descriptions
|
Fields |
Descriptions |
|
Account No |
Specifies the account number of the debtor. |
|
Account Name |
Specifies the account name of the debtor. |
|
Concentration % |
Specifies the concentration % for the customer's invoice. |
|
Cross Aging % |
Specifies the cross aging % for the customer's invoice. |
|
A/R Exclude % |
Specifies the % of amount receivables excluded from the customer's invoice. |
|
A/R Exclude Value |
Specifies the fixed amount receivables excluded from the customer's invoice. |
|
Insurance Limit |
Specifies the Debtors insurance limit, if the defined limit is completed. |
|
Ineligible Reason |
Includes a list of customer's ineligible codes. |
|
Past Due AR Days |
Defines past due date for the client's AR. |
|
Parameter Name |
Specifies the parameter type for the debtor. |
|
Parent Name |
It includes a list of parent names. You can search for debtors with parent names. |
|
Deductible |
Specifies the credit limit for account debtors with foreign accounts. It shows the reporting threshold for each account updated through file upload. |
|
Credit Limit |
Specifies the credit limit of the debtors. |
|
Created Date |
Specifies the created date and time of the debtor. |
|
Comments |
Specifies the number of debtor comments. You can also view the comments for a particular debtor by clicking the hyperlink. You may create or edit the comments as required. |
|
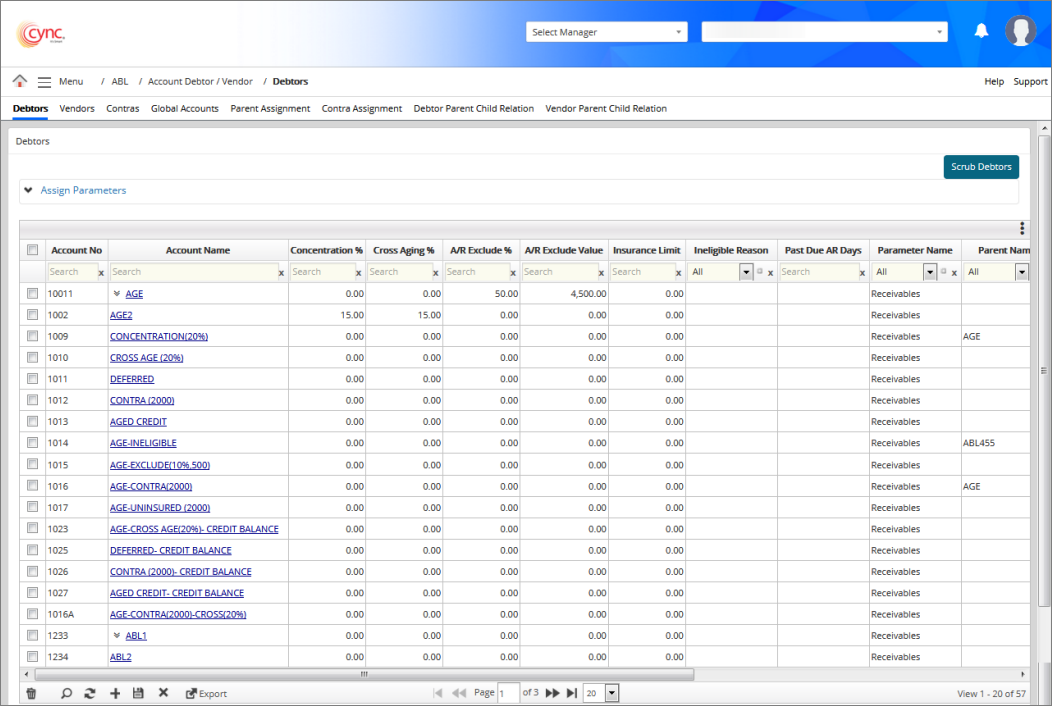
Scrub Debtors |
Deletes independent customer records that are not linked with other clients. |
|
Country Code |
Allows to search the account names using the country code. This is a User Defined Field. |
|
Term Code |
Allows to search the account names using the term code. This is a User Defined Field. |
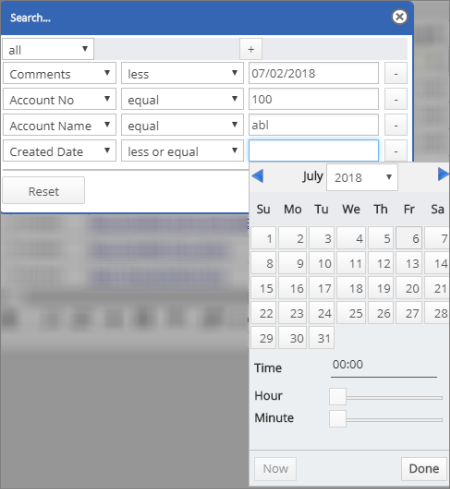
Search – The advanced search option allows you to search the related account debtor details based on the field value.
Click the  button and select a field or parameter you like to view and click the Find button.
A list of related data appears based on the search criteria.
For example, Consider the Created Date. In this case, you can search the debtors based on create date and time criteria (hour and minutes).
Refer to the screenshot:
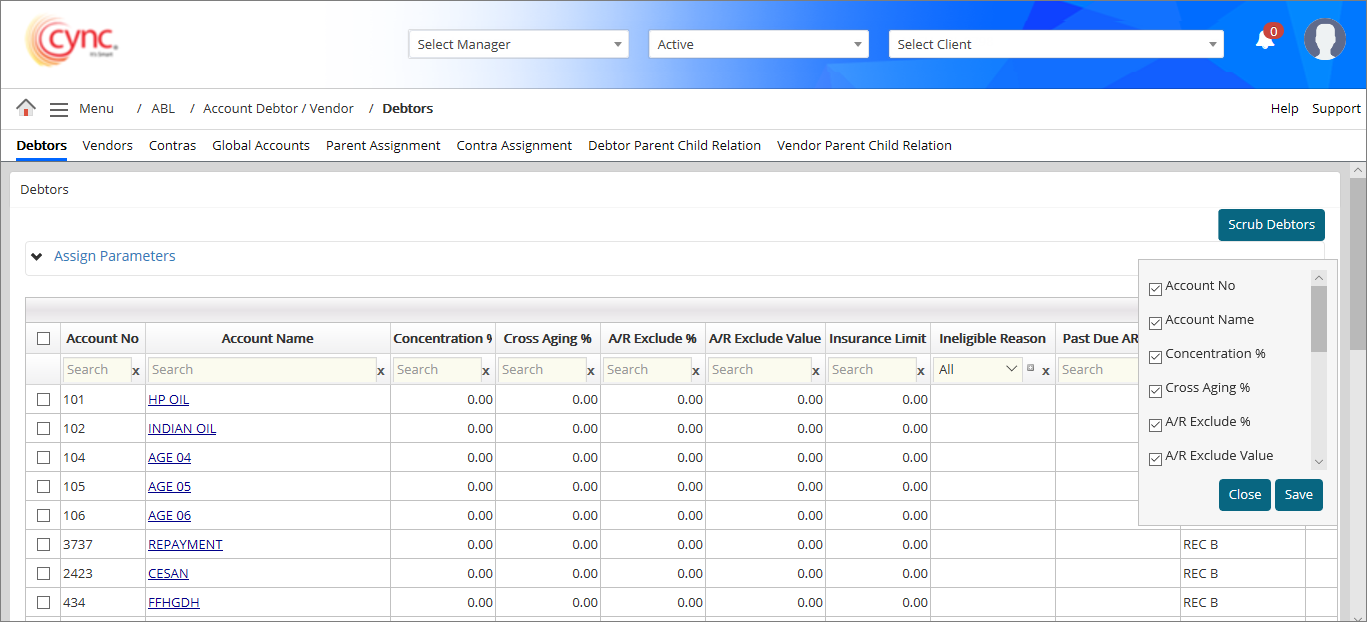
You can also customize the fields to be displayed by clicking on the  button on the right corner of the screen.
To customize the fields, perform these steps:
1. Click on the button, a drop-down list box appears. You can view the list of available fields.
2. Select the fields you would like to display.
3. Click ![]() button.
button.
4. Click  button.
5. Based on the fields selected, the Debtors page shows the relevant fields.
Refer to the screenshot:
 The Term code and Country code are user-defined fields. These fields are not mandatory and are available only when the data are mapped under the User Defined Fields page.
The user can log out of the application with the saved fields if required. When the user logs into the application for the next time, the system displays the saved fields by default.
Add new debtor details
To manually enter a new debtor, perform these steps:
1. Click on the  sign. A new row appears.
2. In the Account No field, enter the account number.
3. In the Account Name field, enter the account name.
4. In the Concentration % field, enter the concentration value.
5. In the Cross Aging % field, enter the value.
6. In the A/R Exclude % field, enter the value.
7. In the A/R Exclude value, enter the value.
8. In the Insurance Limit field, enter the value.
9. In the Ineligible Reason drop-down, select the reason code.
10. In the Past Due AR Days field, enter the value.
11. In the Parameter Name drop-down, select the collateral type.
12. In the Parent Name field, select the parent name from the drop-down list.
13. In the Deductible field, enter the deductible value.
14. In the Credit Limit field, enter the credit limit value.
15. In the Term Code field, enter the value.
16. In the Country Code drop-down, select a value.
The Country code and Term code are User Defined Fields. It is available only when the user maps the relevant data under the User Definition page.
Click on the Account Name Link to set up additional information such as address and contact information or make associations such as assign contras or child relationships.
Refer to the screenshot:
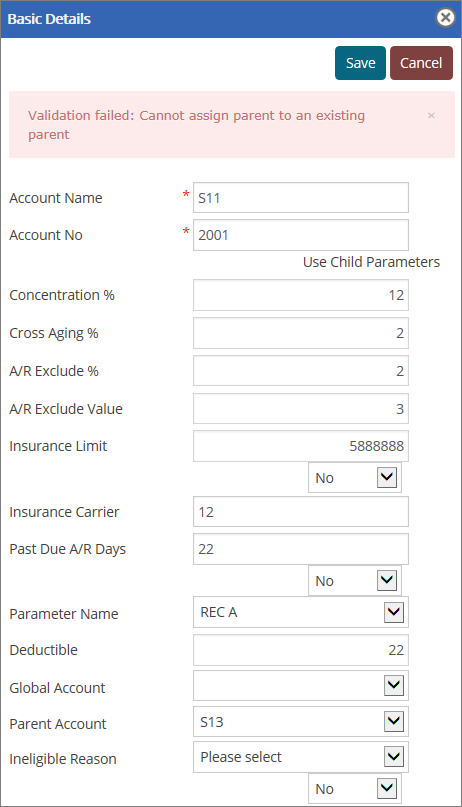
Basic Details
Click on ‘Edit’ and fill in the missing information in the form. Remember that Cync calculates Concentration%, Cross Aging%, A/R Exclude%, A/R Exclude Value and Past Due AR Days.
However, you can override the parameters that were set at the client level by entering new values directly on this screen.
The values entered here will only apply to the specific debtor/customer and will not overwrite the settings at the client level.
Refer to the screenshot:
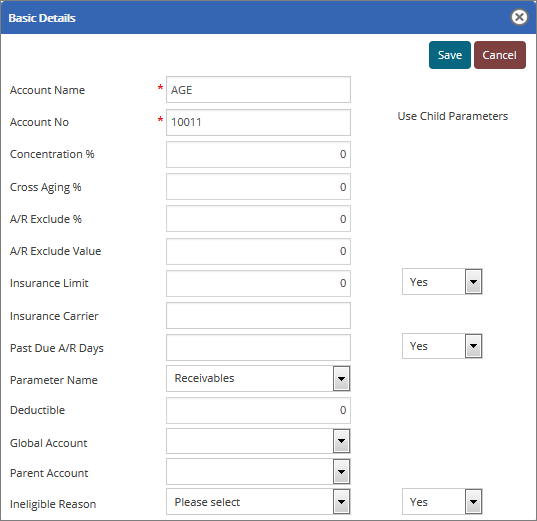
Use Children Parameters
The Use Child parameter feature allows you to calculate the ineligible at the child level.
Select 'Yes' from the drop-down to calculate specific ineligible at the Child level under the Parents account.
If the Use Child parameter is 'No', then the ineligible are by default calculated at the parent level.
![]() For more information related to the calculation of ineligibles based on Use Children Parameters, refer to Use Child Parameters.pdf
For more information related to the calculation of ineligibles based on Use Children Parameters, refer to Use Child Parameters.pdf
Primary Address
Click on ‘Edit’ and enter the primary contact’s information then click on Save. If you would like to enter a second address then repeat the process by selecting Secondary Address.
Account Parameters
Click on ‘Edit’ and enter the customer’s credit limit, credit score, expiration date, and banking information then click on Save. The bank account number is masked except for the last four digits because of security reasons. The NOA Letters, Verification Letters and Audit Letter drop-down shows the list of created letters from the Letter Content page.
Refer to the screenshot:
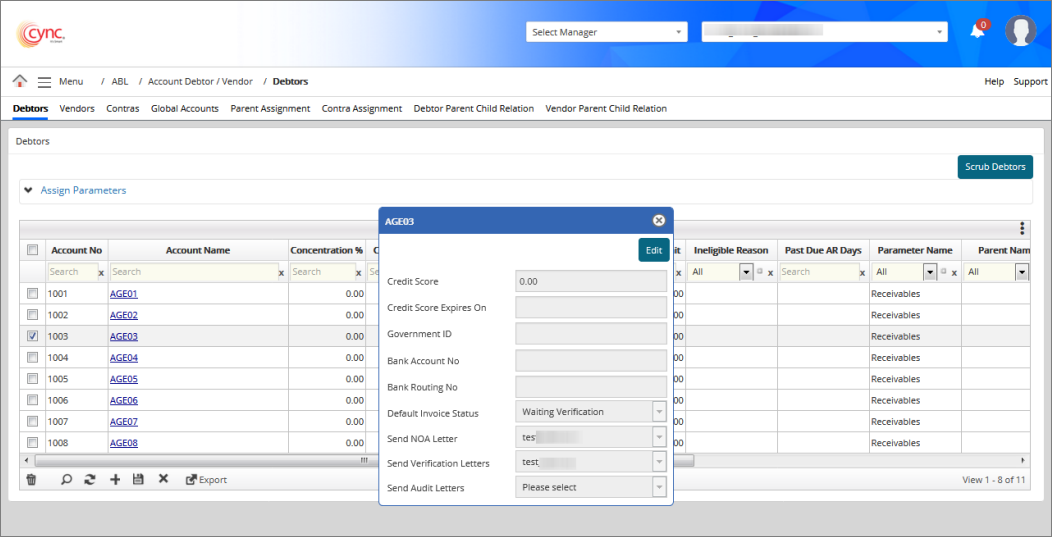
![]() When a letter is defined or selected from the Send NOA Letter, Send Verification Letter, and Send Audit Letter dropdown, then the system displays the same letter names under the Summary Receivables and Detail Receivables pages.
When a letter is defined or selected from the Send NOA Letter, Send Verification Letter, and Send Audit Letter dropdown, then the system displays the same letter names under the Summary Receivables and Detail Receivables pages.
Assign Contras:
Click on ‘Edit’ and start typing in the name of the vendor that you would like to assign as a contra relationship if applicable. Cync will return some values that match what you entered.
Select the appropriate one then Save. The relationship will be assigned and will show up under the ‘Contras’ page.
Comments:
You can add free-text comments that you would like to associate with the customer. To add a comment, click on the ‘+’ sign.
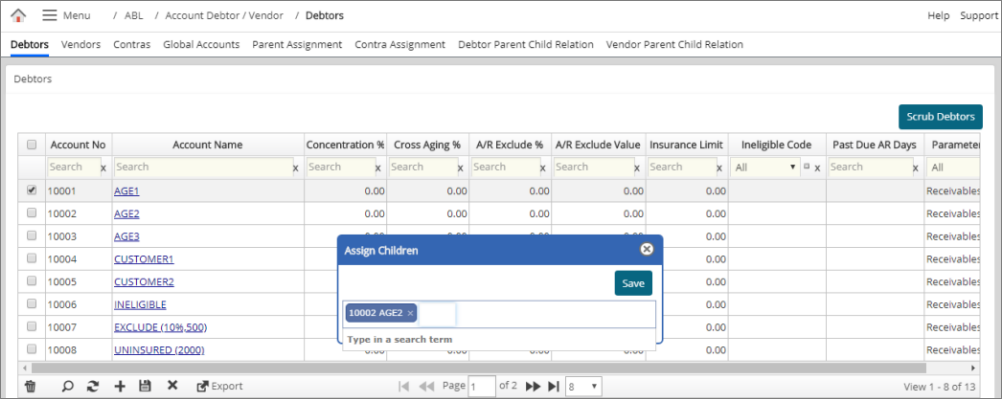
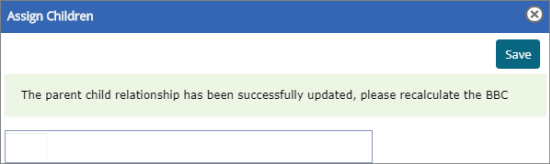
Assign Children:
You can add a Debtor to a particular client after the file uploads under ABL File Uploads. Once the file is uploaded, you can add/delete one or multiple child debtor (s) to parent debtor and recalculate BBC.
To assign a child debtor, perform these steps:
Refer to the screenshot below:
To remove a child debtor, perform these steps:
The details of the child debtors added or removed from a particular client can be viewed under the Debtor Parent Child Relation and Summary Receivables page.
Refer to the screenshot below:
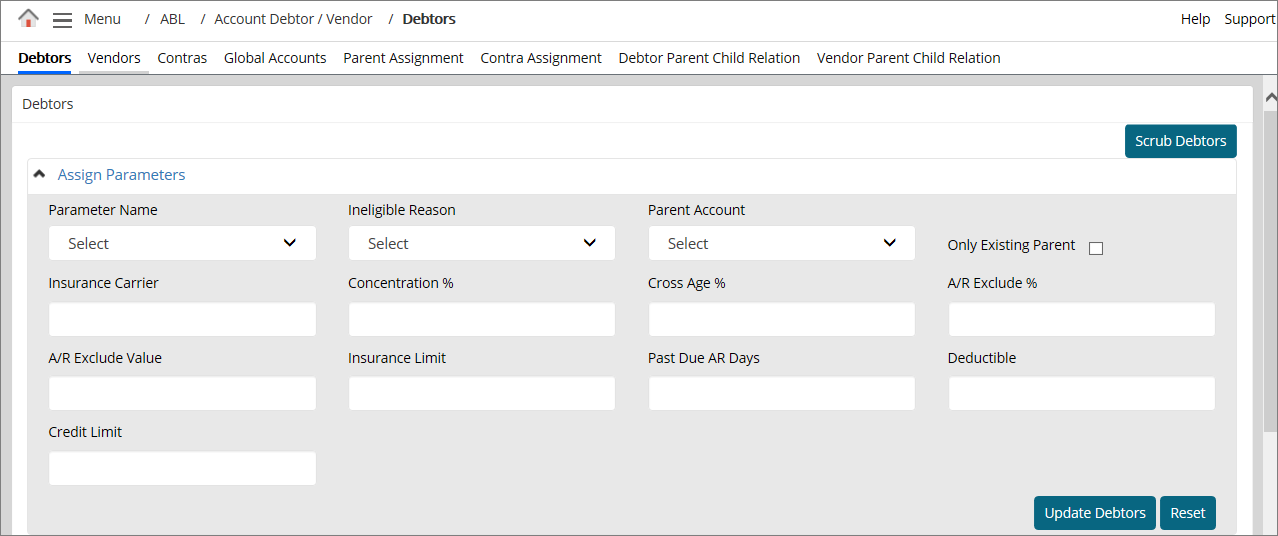
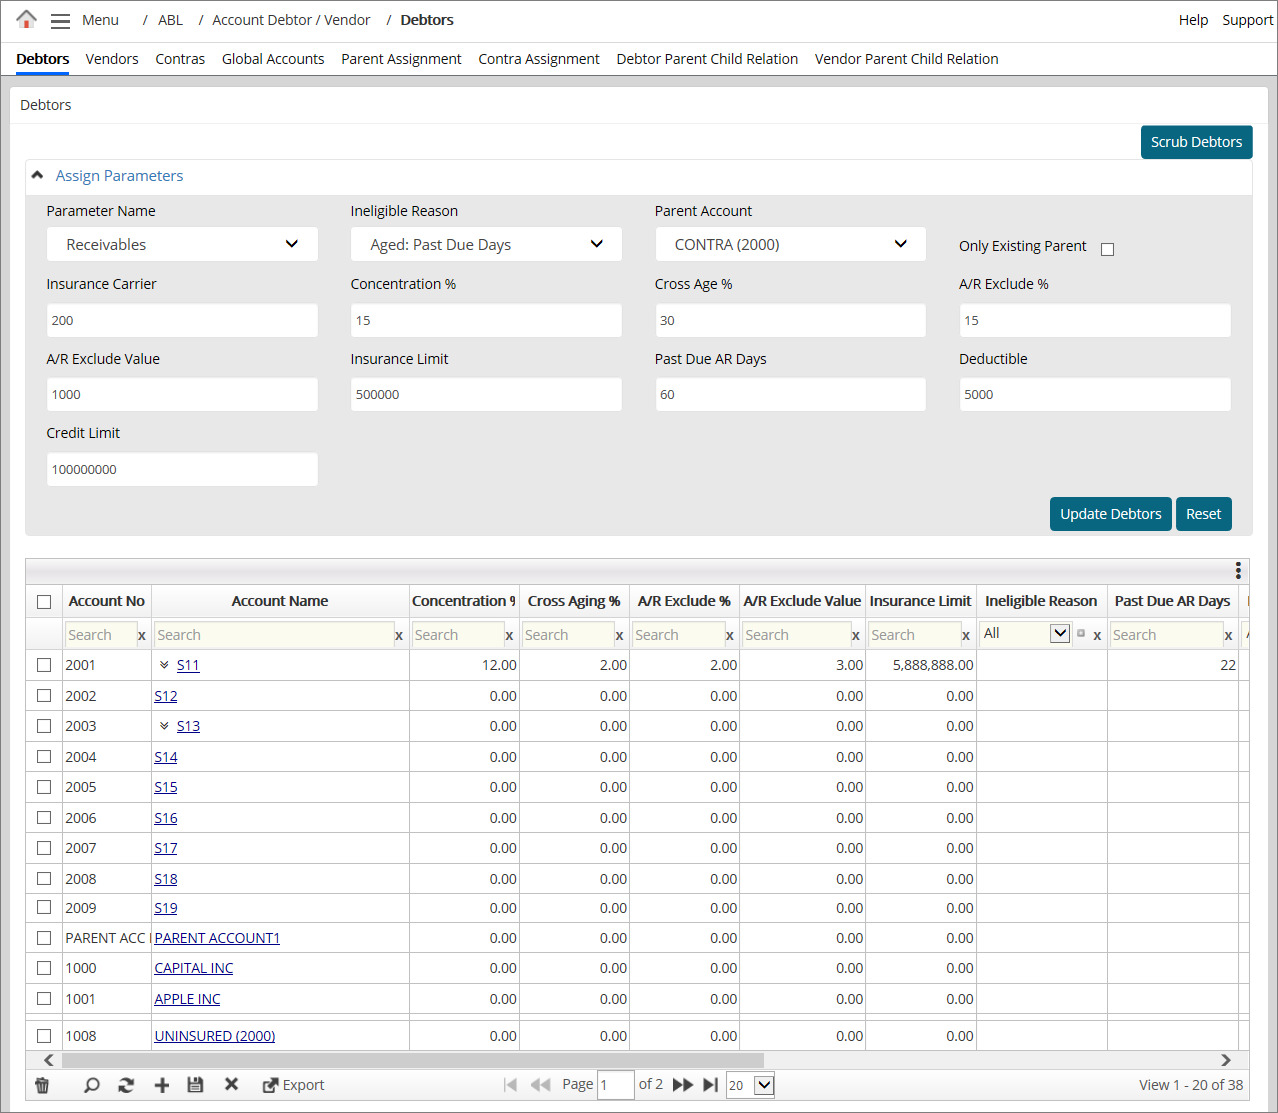
Assign Parameters:
You can assign parameters simultaneously to one or multiple clients. Select multiple debtors and assign the parameters from the list of users.
To assign parameters to the account debtors, perform these steps:
Refer to the screenshot:
If the selected Parameter Name is Receivables, then all the debtors with the parameter name can be viewed. If the Cross-aging is set to 30 and the Past due days are set to 60, then the system assigns the same value to the selected debtors for the particular account parameter. Once the parameters are saved, you can view the updated value for the debtors.
Refer to the screenshot:
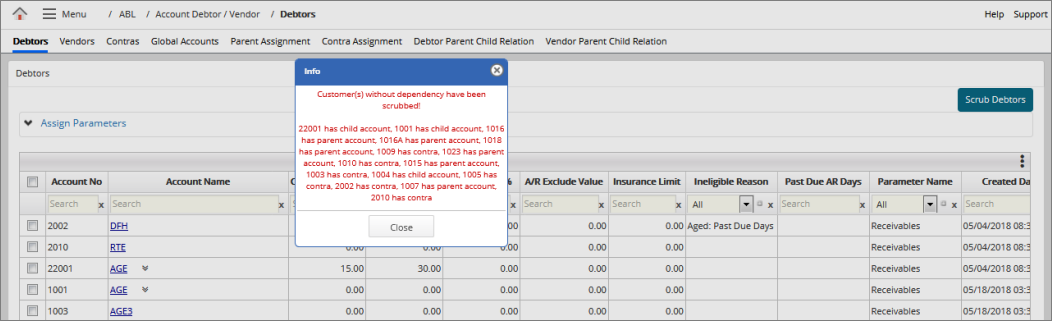
Scrub Debtors:
Click ![]() to purge the debtor records. If the uploaded files are purged under the Upload BBC Data Files page, then the debtors without dependency are purged automatically.
to purge the debtor records. If the uploaded files are purged under the Upload BBC Data Files page, then the debtors without dependency are purged automatically.
The new debtors that are created during the file upload are also purged. If there is a dependency, then the system shows an error message.
Refer to the screenshot:
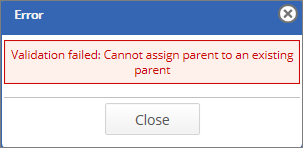
Any parent account debtor cannot be assigned as a child for any debtor. Child debtor of one parent account debtor cannot be assigned as a child debtor of another parent account debtor.
When the user assigns one parent account debtor to another parent account debtor as a child, the system shows an error notification.
Refer to the screenshot:

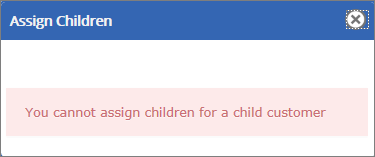
When the user assigns children to a child account debtor, the system shows an error notification.
Refer to the screenshot:
Setup Insurance limit for debtors
Refer to the screenshot: